
Catherine Zeta Jones is wearing her gorgeous thick curly hair in a updo hairstyle while attending the 4th Annual ‘A Fine Romance’ MPTV Benefit at Sony Studios in Culver City, California. This hairstyle is achieved by pinning back her long thick curly locks of hair! Pulling it away from the face to create a sexy, but elegant hairstyle for this event. This hairstyle works great for Weddings, Prom, and other elegant occasions!
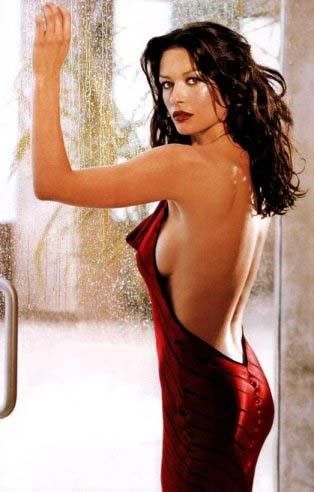
Drawing inspiration from the hair style trends of our favorite stars and celebrities has become a national past time. One such star whose hairstyle has become the latest must have look is Wales-born Hollywood beauty Catherine Zeta Jones. Her sexy face framing hair style, rich chocolate brown hair color and movie star persona is why Catherine was named one of Hollywood ’s sexiest women alive by Esquire magazine.

TO GET THE LOOK: Does your hair get frizzy in damp weather?
If that’s the case, try Catherine’s sexy face framing tousled style and say good-by to frizzy and bad hair days forever. To get the look, let’s take it one step at a time, starting with a style cut and shaping.
LET’S SHAPE IT: For Catherine’s style, start with a long layered silhouette with flirty brow brushing bangs and face framing waves to accent high cheek bones. This ultra feminine style is ideal for natural wavy hair like Catherine’s. With a few adjustments (trims) as it grows you can easily find the ideal length and shape for your style.

LET’S STYLE IT: First, give your hair an extra boost with a puff of gel mousse or setting spray. Just run either through damp hair and comb
in place to dry au natural or toss your hair upside down and give it a
quick blow dry for volume. After, if your locks look a bit on the dry or
frizzy side, a dab of styling cream will tame it. For a dressy look, a
quick turn around your styling iron or a hand full of steam rollers gives
it the look. After, lightly brush and finger comb. To turn up the shine,
finish with a high gloss light hold hair spray and you’ve got Catherine’s
star style!
NOW, LET’S COLOR IT: Actresses change their hair color often for
the many roles they play and Catherine is no exception. If your hair
has lost it deep rich hue and is beginning to gray around the hairline
like Catherine’s, a dark chocolate brown tint will define the shape and
wash the gray away. After, a clear glaze seals-in the color and
amplifies the shine. To keep this up, the new growth is tinted every
six weeks.

Your sexy face framing style will make you fall in love with
your natural wavy hair. And best of all, this "time saving" do' a snap
to style. Just comb in place to dry au natural or toss your hair upside
down and give it a quick blow dry for volume. The rich dark Chocolate
brown hue has washed the gray away and turned the glam bar up a
notch. So toss your old frizzy hair do’ aside and slip into Catherine’s
tousled style with flirty brow brushing bangs and glam hair color and
say so long to bad hair days forever.
For Catherine Zeta Jones's star style visit a salon stylist and make
your hair shine like the stars.
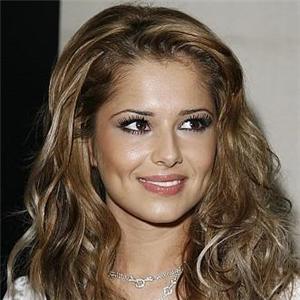 Cheryl Cole is a singer and entertainer. She became part of the popular girl band "Girls Aloud". Cheryl has done some ball room dancing and even some modeling. Her long hair always looks so chic and her wardrobe always in style.
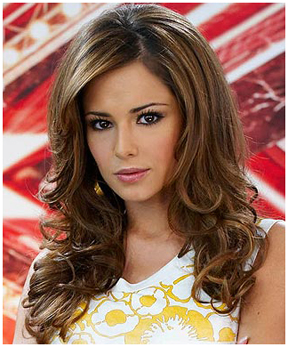 Cheryl Cole's tumbling brunette tresses are courtesy of real hair extensions, the Lucinda Ellery salon being a favourite first port of call for faking length and fullness. In fact, Girls Aloud could keep the hair extension business afloat by themselves with Sarah, Cheryl, Kimberley and Nicola all choosing the best hair extensions to add glamour and variety to their styles.
 They're not the only ones to opt for hair extensions to create that Hollywood babe look however. High School Musical hotties Vanessa Hudgens and Ashley Tisdale have both succumbed to the allure of lengthy locks without the irritating years of waiting the rest of us have to endure.


